
Here is a second tutorial (here is the first one) for creating a Web 2.0 logo like the one above using Adobe Photoshop. Create a new Photoshop file (File>New). I made it in a 4500x4000px file with RGB color and 300dpi resolution, but you can do it in a smaller one.
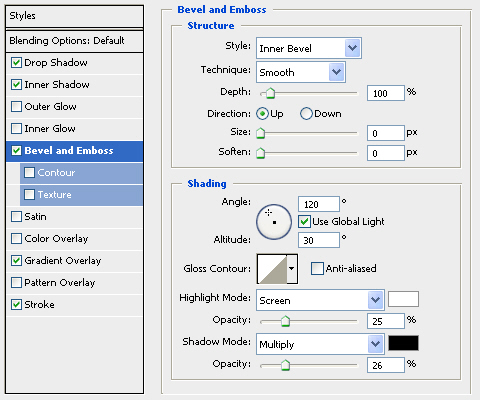
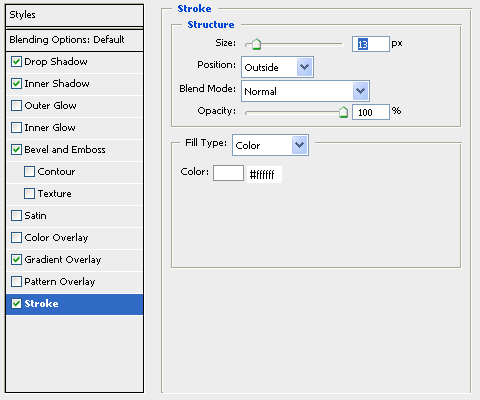
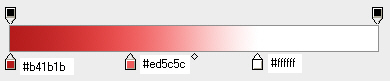
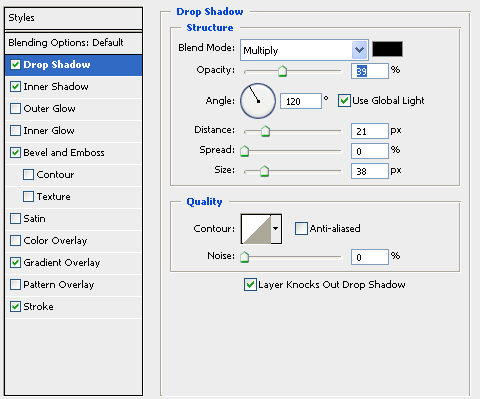
- Create the talk bubble shape using the custom shape tool (if you cannot see the shape in the dropdown menu from shape tool, click the arrow and choose talk bubble shapes). Double click your shape layer and apply Drop Shadow, Inner Shadow, Bevel and Emboss, Gradient Overlay and Stroke effects as shown in the screenshots below.


- After applying the effects, right click on the shape layer and select duplicate layer. Click on the duplicated layer and click edit>transform>flip vertical. Place the flipped shape exaclty below the original one. This shape will be used as the reflection. Double click on the duplicated layer and disable drop shadow and bevel, emboss effect and stroke. Leave Inner Shadow effect as it is and choose the Gradient Overlay effect tab and apply the following settings in the gradient. Set the duplicated shape layer opacity to 30%.

- Choose Type tool and type anything you like in the original shape. Double click the type layer and apply Drop Shadow, Inner Shadow, Bevel and Emboss, Gradient Overlay and Stroke as shown in the screenshots below.


- If you want to create an “i” like the one in my logo choose the custom shape tool, choose symbols from the shape meny selections and place the “i” on your logo. Then apply the same effects as in step 3.
- Create a new layer above all the others and select the eliptical marquee tool. Create an eclipse that covers half the original shape logo and half the duplicated one. Fill the eclipse with white color using the paint bucket tool and drop down the layer opacity to 20%.

Color codes are printed on the screenshots. Your logo is now ready 🙂
Thanks very much for this tutorial. It is clean and simple yet easy to follow. You save my day.
Thank you very much for this tutorial. I enjoyed the way you do this, and I appreciate the step by step instructions for the ones who are experts in this software.